Cashier
Gaming Pass and Gaming Credit Sales Page
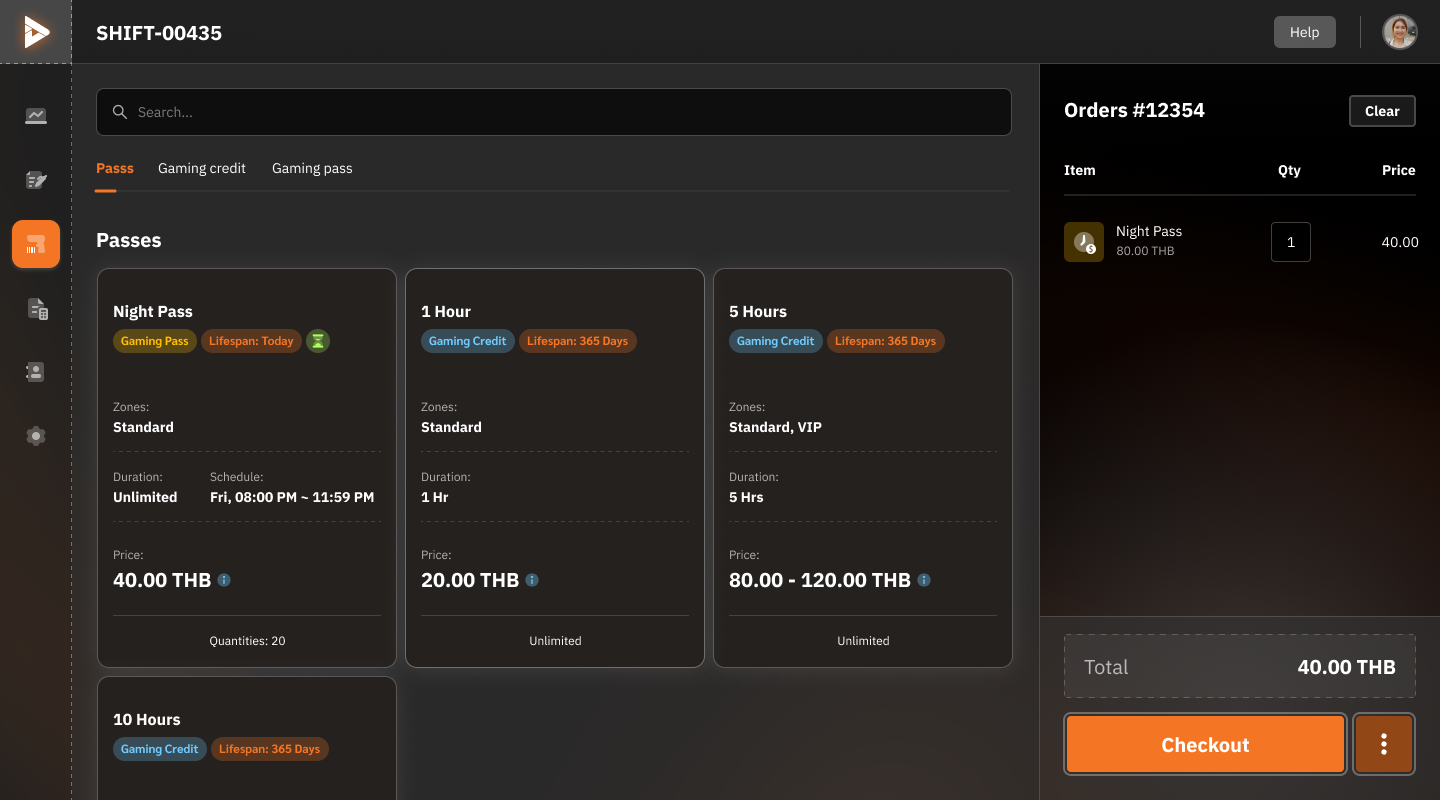
1. Start a Sale
Add Products: Select the desired Gaming Pass or Gaming Credit from the list.
Update Cart: Modify the quantity of items in the cart or select "Clear" to empty the list.
Verify Total: Confirm the price before pressing the "Checkout" button.
Confirm Sale: Process the payment and issue a receipt.
iPLAYCAFE Payment Process
The iPLAYCAFE payment process is divided into two sections.

Basic Usage Steps
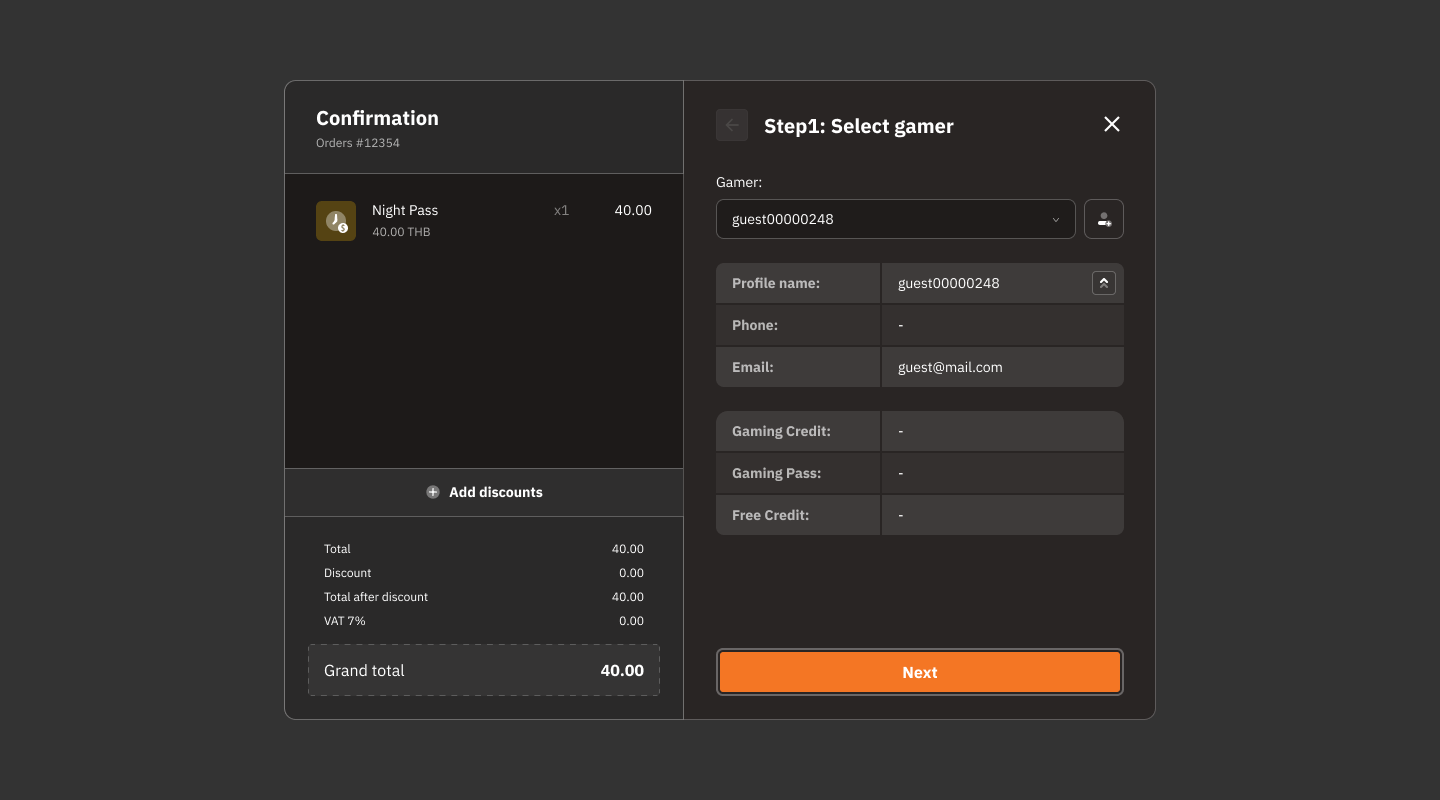
Review Order:
Confirm the selected items and total on the left.
Add Discounts (if applicable):
Click the "Add Discounts" button if the customer wishes to apply a discount.
Search for User:
Enter information in the "Gamer" field to search for a user in the system, or click the add icon if it's a new user.
Proceed:
Click the "Next" button to proceed to the payment step.
1.1 Payment for Member Customers

Usage Steps
Enter Gamer Information:
Enter the customer's phone number, email, or profile name.
Verify Gamer Information:
Ensure the selected account information matches the actual customer.
Add Discounts (if applicable):
Press "Add Discounts" to apply a discount to the customer.
Process Payment:
Press the "Next" button to confirm the order and process the payment.
1.2 Payment for Non-Member Customers (Guests)
Usage Steps
Enter Guest Information:
Enter the Profile name, phone number (if available), or email (if available).
Verify Account Details:
If the Guest account does not match the customer's information, it can be edited before proceeding.
Add Discounts (if applicable):
Press the "Add Discounts" button to apply a discount to the customer.
Proceed:
Press the "Next" button to proceed to the payment confirmation screen.
2. Payment
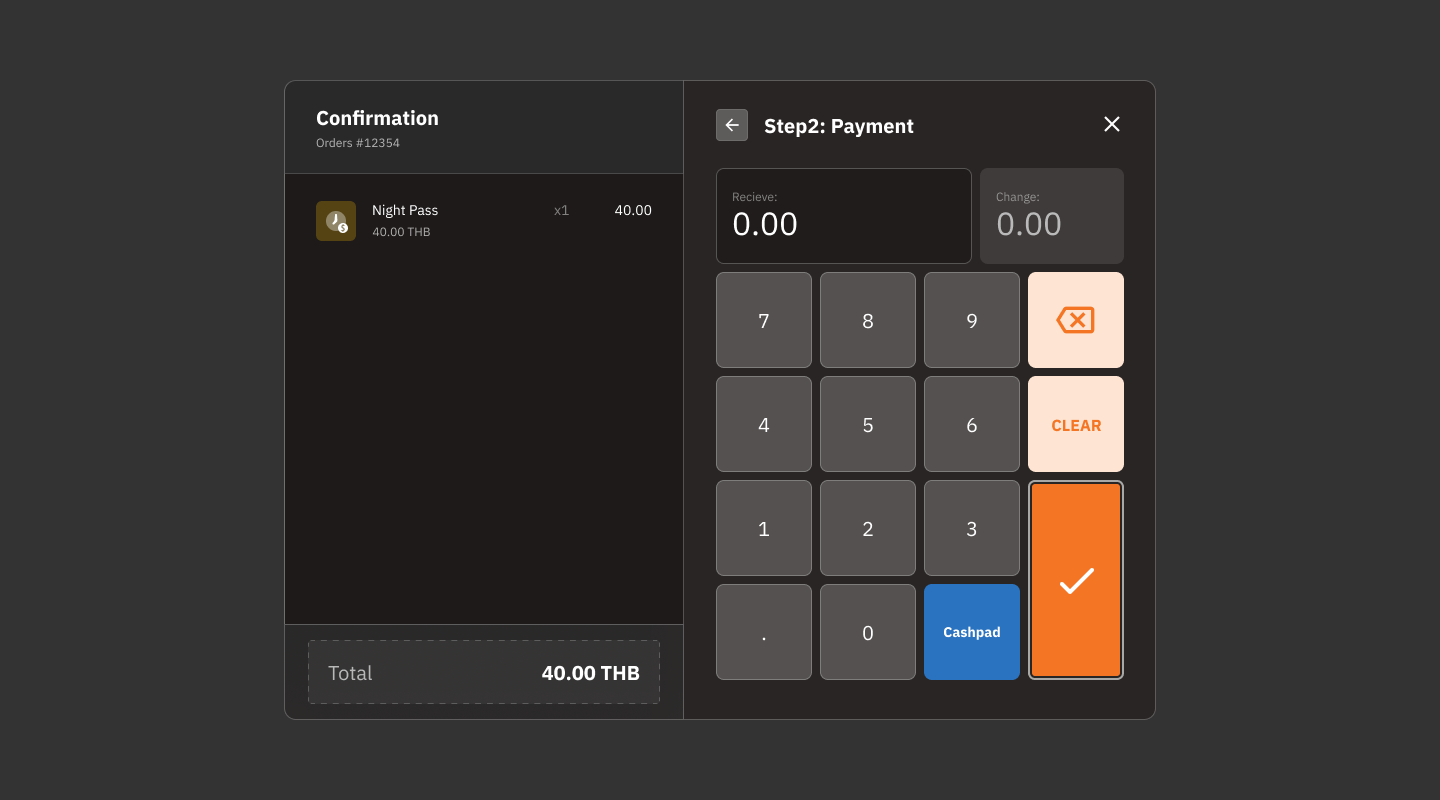
System Calculates Change
Receive Field:
Users enter the amount of money received from the customer.
Change Field:
The system automatically calculates the change.
Numpad:
Used to enter the amount paid by the customer.
Function Buttons:
CLEAR: Clears the data entered in the receive field.
Cashpad: changes the Numpad into quick select cash amount buttons.
✔ Confirmation Button: Click to confirm the payment.
Usage Steps
Enter Amount:
Specify the amount paid by the customer in the "Receive" field.
Verify Change:
The system will calculate the change automatically.
Confirm:
After verifying the information is correct, press the "✔" button to complete the payment.